1. WD5000AAKS Bricked PCB – Hello and thanks in advance for any aid. I have a WD5000AAKS – 00TMA0 DCM – DHNCNV2AHN
Some 6 months ago, while i was installing a fan cooler to another drive (wd250), i connected all of the components in line, on a 12v rail molex with a SATA power splitter, then the fans. After turning on the system it seems like my OEM PSU fried both drive PCBs. I know it probably wouldn’t have been some massive voltage shot through that rail, but i have heard of many people with this problem and i have seen them getting help through this forum.
So what do i do? Do i search for a PCB of a similar DCM and somehow reprogram it? (I have no idea about how to reprogram it)
I also would rather not get another PCB only to try to sholder the chip from my dead one to the new working one knowing i might destroy both.
I can probably unscrew the PCB and take pics of it and show it to some of you people that might know what i should do. I am ok with sholdering this already ruined PCB. I don’t have a multimeter but if i absulutely need one then i will get one.
2. WD5000AAKS PCB burned component – WD5000AAKS – 00TMA0. Burned capacitor(?) C12. There is black gunk on one end of it and even a burn mark on the soft padding material.
Perhaps I could try to replace the part if I knew where to get one.
3. Changing Western Digital PCB’s – I am looking for some help with regards to changing a western digital pcb. In this case the drive in question is: WD5000AAJS.
In the past all i have had to do is find a donor pcb, de-solder the u12 Rom chip,and put the original rom chip in its place.Depending on the condition of the drive, this has worked most of the time. When removing the pcb from the above drive(WD5000AAJS)there is no rom chip, just an empty space marked U12.
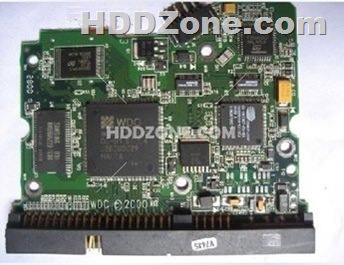
PCB Western Digital on HDDZone.com
HDDZone.com provides all kinds of hard drive PCB boards. Free shipping worldwide!
HDD PCB Online Shop: HDDZone.com
Useful Guide: Hard Drive PCB Replacement
Contact US: Please feel free to contact us by email sales@hddzone.com.
Note: Send clear photos of your PCB (both sides) by attachments will make everything easier!
